In summary:
- Identify and air-seal specific cold spots like rim joists, not just general insulation.
- Install a frost-proof outdoor faucet to prevent hidden leaks that cause spring floods.
- Use a targeted, step-by-step cottage winterization plan to avoid catastrophic damage.
- Never use a blowtorch to thaw a pipe; use gradual, safe heat sources like a hair dryer.
- Know who pays for damages: your insurer, but only if you’ve taken reasonable preventive steps.
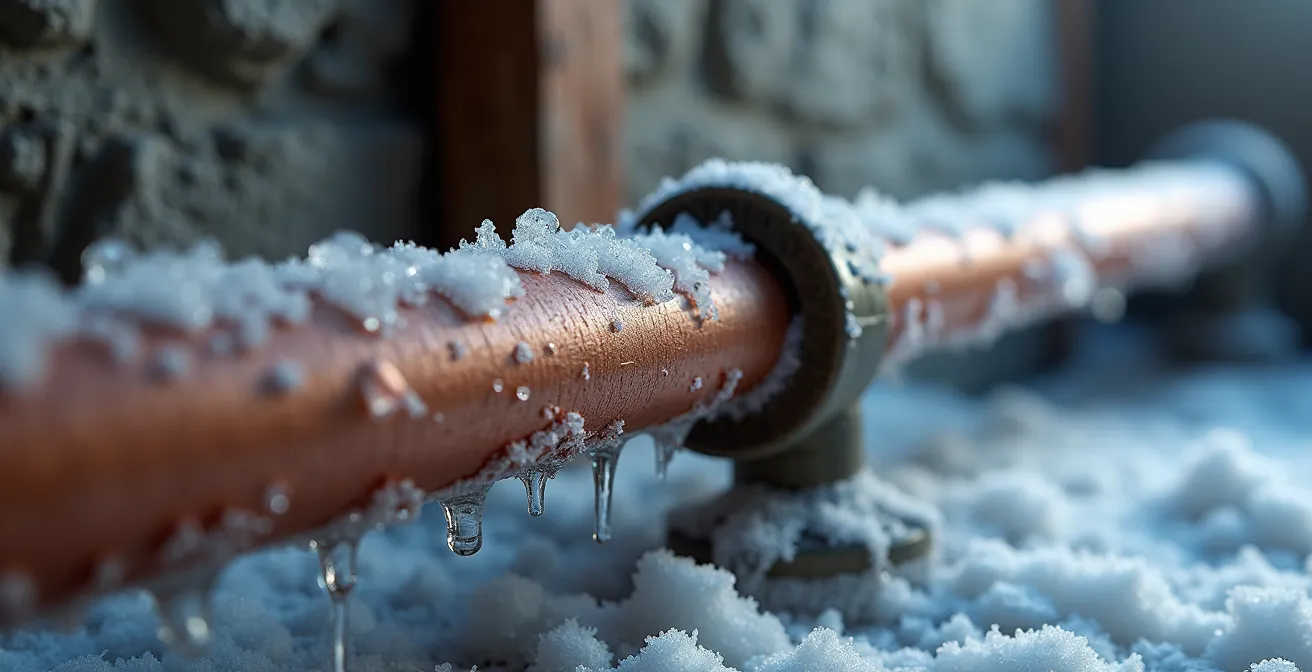
That biting sound the wind makes when the thermometer plunges below -20°C is a familiar Quebec soundtrack. But for homeowners, a more terrifying sound is the dead silence when you turn on a tap, followed by the catastrophic bang of a burst pipe. Every winter, I see the fallout: flooded basements, ruined floors, and panicked calls. Many homeowners think simply wrapping pipes in foam is enough. It isn’t. The generic advice you read online often fails to account for the specific construction of our homes and the sheer ferocity of our winters.
The real enemy isn’t just the cold; it’s the invisible air leaks and thermal bridges unique to your home’s structure. It’s the standard outdoor faucet that seems fine all winter, only to reveal a catastrophic crack in April. The key to surviving a Quebec winter with your plumbing intact isn’t about simply adding more insulation—it’s about strategic defense. It’s about understanding *why* a specific pipe freezes and applying a precise, professional-grade solution that holds up against a polar vortex, not just a chilly evening.
This guide cuts through the noise. We’re going to move beyond the basics and get into the specific, actionable strategies that work here, in Quebec. From diagnosing weak spots in your foundation to the correct way to winterize your chalet, you will learn how to protect your home not just from the cold, but from the immense pressure and financial cost of a burst pipe.
To give you a clear path to a secure home, this article breaks down the essential prevention strategies. The following summary outlines the key areas we will cover, from identifying hidden risks in your basement to understanding your insurance coverage in a worst-case scenario.
Summary: A Plumber’s Guide to Preventing Frozen Pipes in Quebec
- Why Do Your Pipes Always Freeze in the Same Spot?
- Frost-Proof vs. Standard Faucet: Which One Prevents a Spring Flood?
- How to Insulate Your Pipes for Under $50 CAD
- The #1 Mistake When Thawing a Frozen Pipe
- Cottage Winterizing: The 5-Point Checklist for a Damage-Free Spring
- Glycol Mix: 30% vs. 50% to Survive a -35°C Night?
- Spray Foam vs. Cellulose: What’s Best for Leaky Rim Joists?
- Who Pays When a Pipe Bursts Inside Your Wall?
Why Do Your Pipes Always Freeze in the Same Spot?
It’s not bad luck. If a pipe in your basement freezes year after year, it’s a clear sign of a specific structural weakness. The culprit is almost always a combination of poor insulation and, more importantly, an unsealed air leak. Cold air from outside finds a direct path to your pipe, creating a “thermal bridge” that saps heat away relentlessly. In most Quebec homes, the number one weak point is the rim joist (solive de rive)—the wooden frame that sits on top of your concrete foundation. Small gaps here act like open windows, blasting frigid air directly onto nearby plumbing.
Ignoring this problem is a costly gamble. According to Canadian insurance data, water damage from burst pipes costs homeowners $4,200 or more in average repairs, and that doesn’t account for the headache of cleanup and potential mould issues. The pressure that builds up between an ice blockage and a closed faucet is immense—over 2,000 PSI—and it’s this pressure, not the expanding ice itself, that splits copper or PEX pipes open.
Before you can fix the problem, you have to find the exact cold spot. You don’t need expensive equipment; a bit of detective work is all it takes. The goal is to pinpoint where the cold is infiltrating so you can seal it off permanently, not just cover the pipe and hope for the best.
Action Plan: Pinpointing Cold Spots in Your Basement
- Invest in a tool: Purchase an infrared thermometer from a store like Canadian Tire or Rona (often under $75 CAD). This gives you instant, precise readings.
- Target key areas: Focus your scans on pipes located near exterior walls, paying special attention to north-facing walls which receive no sun in winter.
- Inspect the rim joist: Methodically scan the area where the concrete foundation meets the wooden structure of your house. This is the most common source of air leaks.
- Use the damp cloth trick: For a low-tech alternative, run a damp cloth along a pipe. It will freeze or ‘stick’ slightly to the sections that are at or below freezing temperature.
- Look for visual clues: On the coldest days, you can often see a light layer of frost forming directly on the surface of the most vulnerable sections of your pipes. This is a red flag.
Frost-Proof vs. Standard Faucet: Which One Prevents a Spring Flood?
That standard outdoor hose bib is a ticking time bomb in a Quebec winter. Many people diligently shut it off from the inside, but they don’t realize the real danger. A small amount of water can remain trapped in the faucet body, which is exposed to the exterior cold. It freezes, expands, and creates a hairline crack. You won’t notice it all winter. But in April, when you turn the water back on, that tiny crack unleashes a steady, hidden leak inside your wall cavity, leading to rot, mould, and a devastating repair bill.
The definitive solution is to replace it with a frost-proof faucet (also called a sillcock). Its design is brilliantly simple: the actual valve that shuts off the water is located 8 to 12 inches inside the house, in the heated space. When you turn the handle outside, you’re turning a long stem that operates the valve far from the cold. The exterior pipe is designed to drain completely, leaving nothing to freeze. For compliance with the Quebec Building Code, ensure the model includes an integrated vacuum breaker to prevent backflow.
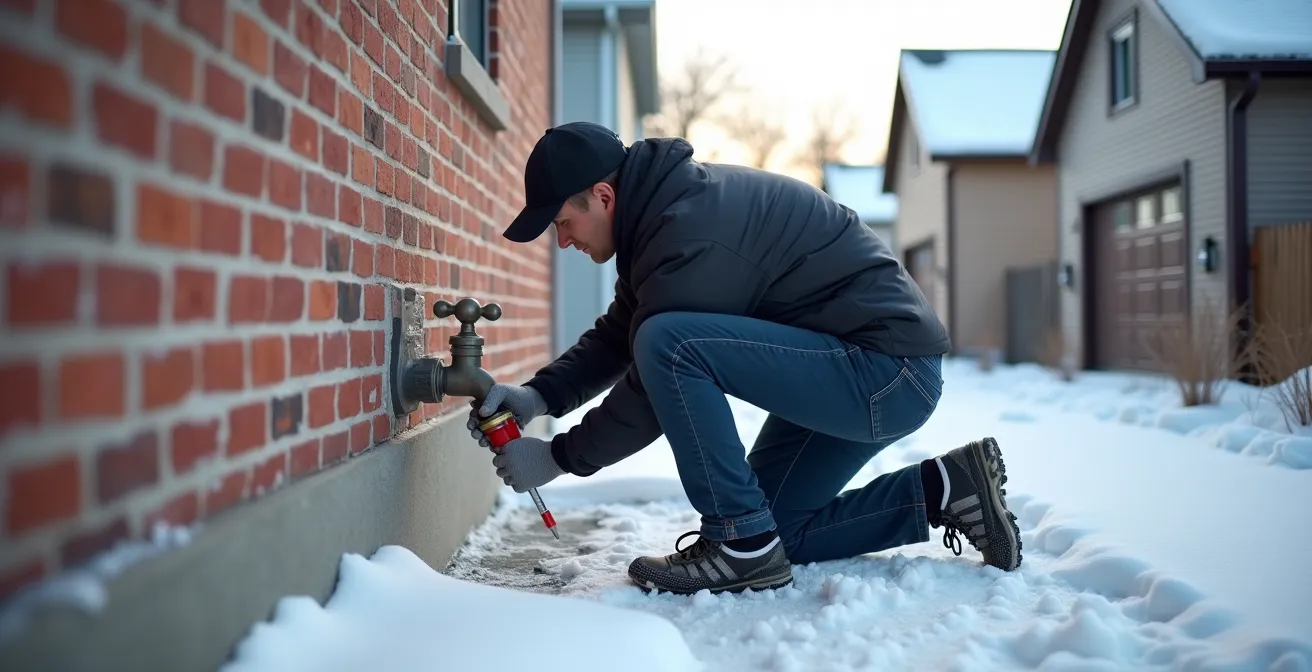
As the image shows, a professional installation ensures the faucet is pitched slightly downwards toward the outside, guaranteeing that every last drop of water drains out after use. This small detail is critical for its function. While the upfront cost is higher, the peace of mind and protection against a catastrophic spring flood make it one of the smartest plumbing upgrades for any Quebec home.
This comparative analysis highlights the clear advantages of making the upgrade.
| Feature | Frost-Proof Faucet | Standard Faucet |
|---|---|---|
| Price Range | $80-$150 CAD | $25-$50 CAD |
| Installation Depth | 8″, 10″, 12″ options to match wall thickness | Surface mount only |
| Freeze Protection | Valve inside warm space | Valve exposed to cold |
| Spring Risk | Low if properly pitched | High – hidden leaks common |
| Quebec Code Compliance | Includes vacuum breaker | May require additional backflow preventer |
How to Insulate Your Pipes for Under $50 CAD
Effective insulation doesn’t have to be a major expense. For less than the cost of a nice dinner out, you can protect the most vulnerable pipes in your basement or crawlspace. But let’s be clear: insulation only works if you’ve already addressed any air leaks. Insulation slows heat loss; it doesn’t create heat. If a pipe is in a draft of -20°C air, it will eventually freeze, no matter how much foam you wrap around it. After you’ve sealed the air leaks (especially at the rim joist), a targeted insulation strategy is your next line of defense.
For most exposed copper or PEX pipes, simple polyethylene foam sleeves are the most cost-effective solution. They are pre-slit, so you can easily slip them over the pipe. It’s crucial to seal the seam with specialized insulation tape to create a continuous barrier. Don’t use duct tape, as the adhesive fails in the cold. A common mistake is to insulate only hot water pipes to save energy. In a Quebec winter, cold water pipes are the priority for freeze prevention.
Case Study: The Under-$50 Réno-Dépôt Shopping Cart
A homeowner can walk into a Quebec hardware store like Réno-Dépôt or Home Hardware and build a complete basic pipe protection kit for under $50. A typical shopping cart would include: 20 feet of polyethylene foam pipe sleeves (around $15-$20), a roll of foil-backed insulation tape ($8-$10), and two rigid foam covers for outdoor faucets ($10-$15). This simple investment is enough to protect the most at-risk pipes in a typical suburban bungalow. It’s important to note that while PEX tubing is more resistant to bursting than copper, it can still freeze and block water flow, so it requires the same insulation in cold spots.
When choosing your insulation, consider the location. Standard foam sleeves are perfect for generally cool basements. For pipes running very close to an exterior wall or in a poorly sealed crawlspace, upgrade to thicker rubber insulation. It offers better thermal resistance and durability, though it costs more per foot. For larger diameter drain lines that you want to protect, flexible fiberglass wraps are the best option.
The #1 Mistake When Thawing a Frozen Pipe
When you have no water and you suspect a frozen pipe, panic can set in, leading to dangerous decisions. The single biggest mistake a homeowner can make is reaching for a blowtorch or any open flame. I’ve seen the aftermath: melted plastic pipes, scorched joists that almost caught fire, and even burst pipes caused by heating the metal too quickly. As The Personal Insurance Company warns in a guide published by the Ontario Society of Professional Engineers, this is a critical safety hazard.
Don’t use a blowtorch—it could damage plastic pipes or cause a fire.
– The Personal Insurance Company, Ontario Society of Professional Engineers – Frozen Pipes Prevention Guide
Applying intense, concentrated heat creates two major risks. First, you can create steam inside the pipe, which builds up pressure between the ice blockage and the torch, causing the pipe to rupture violently. Second, the risk of starting a fire in the tight, often dusty confines of a basement or crawlspace is extremely high. The correct approach is always gradual, gentle heat applied over a wide area. Start at the end of the pipe closest to an open faucet and work your way back towards the blockage. This gives the melting ice and steam a path to escape.
If you’re facing a frozen pipe, put the torch away and use one of these safer methods. Patience is your best tool here.
- Method 1 – Hair Dryer (Slowest, Safest): Keep the dryer on a medium setting and constantly move it back and forth along the pipe. Never hold it in one spot.
- Method 2 – Electric Heating Pad: Wrap an electric heating blanket or pad around the frozen section. This provides gentle, consistent heat. Monitor it closely.
- Method 3 – Heat Gun (on LOW): This is more powerful than a hair dryer and must be used with extreme caution. Keep it on the lowest setting and, like the hair dryer, keep it moving constantly.
- Method 4 – Hot Water Towels: Soak towels in hot water, wring them out, and wrap them around the pipe. You’ll need to replace them frequently as they cool.
- Professional Option: If DIY methods fail or the pipe is inaccessible, call a professional. You can also rent specialized pipe thawing machines from equipment suppliers like Simplex or Lou-Tec in Quebec.
Cottage Winterizing: The 5-Point Checklist for a Damage-Free Spring
Closing the cottage for the winter is a quintessential Quebec ritual, but getting it wrong can lead to a devastating spring opening. A burst pipe in an unoccupied property can leak for weeks or months, causing tens of thousands of dollars in damage. According to the Insurance Institute for Business and Home Safety, the average cost of plumbing system failures after the deductible can be significant, with some data suggesting figures around $5,092 for plumbing failures. The goal of winterizing is simple: get every single drop of water out of the system. This checklist is your blueprint for a dry and secure winter.
The most crucial step, and the one most often done incompletely, is blowing out the lines with an air compressor. Simply opening taps and draining them isn’t enough; water will remain in low spots and in the small channels of faucets and valves, where it can freeze and cause cracks. Renting a small compressor from a place like Lou-Tec and getting the right fittings to connect to your plumbing system is a non-negotiable step for a proper shutdown. It’s also vital to decide on your heating strategy in coordination with Hydro-Québec’s rates—either a complete power shutdown or leaving minimal heat (around 7°C) as a backup measure.
Follow these five steps religiously. Do not cut corners. This is your master plan for ensuring you can turn on the tap in April and have water flow, not a waterfall down your walls.
Checklist: The Complete Quebec Cottage Winterization
- Drain the Heart of the System: Shut off the main water supply and completely drain the water pump (whether it’s a jet pump or submersible) and the pressure tank.
- Blow Out Every Line: Use an air compressor with the proper fittings to blow compressed air through every single pipe, faucet, and showerhead until only air comes out.
- Protect Traps and Toilets: After draining, pour non-toxic plumbing antifreeze (the pink stuff) into all toilet bowls and down every P-trap under sinks and in floor drains to prevent them from freezing and cracking.
- Make the Heat & Hydro Decision: Decide whether to shut off all power via the main breaker or to leave the heat on a minimal setting (7°C) as a backup. Inform Hydro-Québec if you are fully shutting down for an extended period.
- Document for the Spring: Take photos of all shut-off valve locations and leave yourself detailed, clear instructions for the spring reopening sequence. What seems obvious in October can be a mystery in May.
Glycol Mix: 30% vs. 50% to Survive a -35°C Night?
For plumbing in the most vulnerable locations—like a three-season porch, a barely-heated garage, or the cottage you can’t fully drain—plumbing antifreeze is your last line of defense. But not all antifreeze is the same, and using the wrong type or concentration is a critical error. You must only use propylene glycol-based antifreeze (typically pink) in potable water systems. Never use ethylene glycol (typically green), as it is highly toxic and used for vehicles.
The key to effective protection is matching the glycol-to-water ratio to the coldest temperature you expect. A 30% solution might be fine for a milder climate, but it’s inadequate for a deep Quebec cold snap. For a night that dips to -35°C, you need a much more robust mixture. Over-diluting the solution to save a few dollars completely defeats the purpose and gives you a false sense of security. Always buy food-grade propylene glycol from a reputable retailer like Canadian Tire and check the manufacturer’s chart for burst protection ratings.
Once you’ve chosen your concentration, you need to introduce it into the drained system and, just as importantly, flush it out correctly in the spring. Introduce the solution at the lowest point and push it through the system until you see the pink liquid emerge from each tap. In the spring, flush the entire system with fresh water for a minimum of 15 minutes and test the water quality before drinking, following Quebec health guidelines.
The science is clear and this data, while from a BC government source, is based on universal chemical properties applicable anywhere.
| Burst Protection Down To | Propylene Glycol % | Type | Safe for Potable Water |
|---|---|---|---|
| -20°C | 30% | Pink (Propylene) | Yes |
| -35°C | 45% | Pink (Propylene) | Yes |
| -50°C | 55% | Pink (Propylene) | Yes |
| Any | Any | Green (Ethylene) | NO – TOXIC |
Spray Foam vs. Cellulose: What’s Best for Leaky Rim Joists?
We’ve identified the rim joist as the primary battlefield in the war against frozen pipes. This is where your insulation strategy matters most. You have two main choices: cellulose (a paper-based product) or closed-cell spray foam (urethane giclé). While cellulose is cheaper, for a leaky Quebec rim joist, spray foam is almost always the superior choice. The reason is simple: spray foam provides both insulation (R-value) and a perfect air seal in a single application. It expands to fill every crack and gap, creating a monolithic barrier that stops cold air dead in its tracks.
Cellulose, on the other hand, only insulates. It doesn’t stop air movement. To use it effectively, you would need to meticulously install a separate polyethylene vapour barrier first, a difficult and often imperfect task in the tight, irregular spaces around joists. Any small tear or unsealed edge in the poly negates much of the benefit. In the Quebec market, professional spray foam installation might cost $3-5 per square foot, but its superior air-sealing capability often leads to better airtightness scores in programs like Rénoclimat, potentially unlocking thousands of dollars in government grants that offset the initial cost.
For very old homes with fieldstone foundations, there’s a nuanced consideration. Applying closed-cell spray foam directly to the stone can sometimes trap moisture. In these specific cases, a hybrid “flash and batt” approach is often best: a thin one-to-two-inch layer of spray foam to air-seal, followed by traditional rock wool or fiberglass batts to complete the R-value. This provides the air seal you need while allowing the historic foundation to breathe.
Key takeaways
- The primary cause of frozen pipes is not just cold, but direct air leaks, especially at the rim joist.
- A frost-proof outdoor faucet is a non-negotiable upgrade to prevent hidden spring leaks inside walls.
- Safe thawing is gradual thawing; never use a blowtorch. Use a hair dryer or heating pad.
Who Pays When a Pipe Bursts Inside Your Wall?
Despite your best efforts, disaster can strike. When you’re faced with a flooded basement from a pipe that burst inside a wall, the first question after “how do I stop the water?” is “who is going to pay for this?” The short answer is: typically, your homeowner’s insurance. In fact, according to industry data, burst pipes rank among the most common winter insurance claims in Canada. Standard policies usually cover “sudden and accidental” water damage, which a burst pipe certainly qualifies as.
However, coverage isn’t guaranteed. Insurers expect homeowners to take “reasonable steps” to maintain their property and prevent foreseeable damage. If you left your house unheated for a week in January without shutting off the water, or if you failed to properly winterize your cottage, your claim could be denied on the grounds of negligence. This is why documenting your prevention efforts, like following a winterization checklist, is so important. The policy will cover the resulting damage—the ruined drywall, flooring, and furniture—but usually not the cost of repairing the broken pipe itself. Your deductible will also apply.
In the chaos of a water emergency, having a clear plan is critical to protecting both your home and your insurance claim. Follow these steps immediately.
- Step 1: Shut Off the Water. Your main water shut-off valve is the most important thing to locate in your home. Stop the flow of water immediately to prevent further damage.
- Step 2: Call Your Insurer. Use their 24/7 claims hotline. Have your policy number ready. For major Quebec insurers, this could be Desjardins (1-888-337-5274) or Intact (1-866-464-2424).
- Step 3: Document Everything. Before you move or clean anything, take extensive photos and videos of the damage with your phone. This is crucial evidence for your claim.
- Step 4: Contact a Certified Cleanup Company. Your insurer will recommend one, but trusted names in Quebec include GUS, Sinisco, and Qualinet. They have the equipment to dry out the structure properly and prevent mould.
- Step 5: Keep All Receipts. Keep every receipt for any emergency repairs, cleanup services, or temporary accommodation costs if you have to leave your home.
To fully protect your investment, the next logical step is to conduct a thorough audit of your home’s specific vulnerabilities. Use this guide to walk through your basement and property, identify your unique risk factors, and take action before the next deep freeze arrives. Your plumbing will thank you for it.
Frequently Asked Questions about Pipe Freezing and Insulation
Is spray foam eligible for Quebec’s Rénoclimat grants?
Yes, spray foam insulation qualifies for Rénoclimat grants. Because it provides an excellent air seal, it often results in better airtightness scores during the required evaluation, which can lead to larger rebates compared to using cellulose alone.
Can spray foam trap moisture in old stone foundations?
Yes, this is a valid concern. In historic Quebec stone foundations, applying closed-cell spray foam directly can trap moisture that needs to escape. For these specific cases, it’s often recommended to use the “flash and batt” approach (a thin layer of foam for an air seal, plus traditional insulation) or to consult a specialist in historic renovations.
What R-value is required for rim joists in Quebec?
The Quebec Building Code specifies a minimum R-value of R-20 for rim joists. This can typically be achieved with about 3 to 4 inches of closed-cell spray foam or approximately 6 to 8 inches of cellulose insulation (provided there is a proper air barrier).