In summary:
- Your high bill isn’t just about the thermostat. The real, substantial savings are found in a systems-based approach to your home’s energy use.
- Eliminating “phantom loads” from electronics that are turned off but still drawing power is the easiest, fastest way to cut waste.
- Actively participating in Hilo’s peak-period challenges, rather than just enrolling, unlocks the program’s maximum financial rewards.
- Overlooked insulation gaps, especially in the basement’s rim joist area, are a major source of heat loss that basic weatherstripping misses.
- Aligning your consumption with a dynamic rate plan like Hydro-Québec’s Rate Flex D is critical to amplifying the savings from all your other efforts.
That moment is a rite of passage for every Montreal homeowner: opening the Hydro-Québec bill after a deep freeze in January and feeling a genuine shock. Your first instinct is likely to blame the thermostat and tell everyone to put on another sweater. You’ve heard the standard advice a thousand times: seal drafts, switch to LEDs, take shorter showers. While these tips help, they are merely scratching the surface and will never lead to a significant, 20% reduction in your bill.
The truth is, your home’s energy consumption is a complex system. A truly drastic reduction in your bill doesn’t come from a single action, but from understanding and mastering this system. The real key isn’t just using less energy, but using it smarter. It’s about tackling the invisible energy drains you don’t even know you have, strategically partnering with Hydro-Québec’s smart grid programs, and making targeted upgrades that pay for themselves.
But what if the path to these savings wasn’t about sacrifice, but about strategy? What if you could achieve a warmer, more comfortable home that costs significantly less to run? This isn’t about guesswork; it’s about applying the principles of a professional energy audit to your own home. It’s about shifting from a mindset of passive conservation to one of active energy management.
This guide will walk you through that exact process. We will dissect your energy bill by identifying the hidden culprits of overnight consumption, decoding Hydro-Québec’s powerful savings programs like Hilo and Rate Flex D, pinpointing the most cost-effective heating and insulation solutions for a Quebec climate, and finally, creating a concrete plan to connect all your smart devices for maximum financial return.
To help you navigate this comprehensive guide, we’ve structured the information into clear, actionable sections. Below is the table of contents that will serve as your roadmap to a lighter, more manageable Hydro-Québec bill this winter and for all winters to come.
Table of Contents: Your Roadmap to a Lighter Hydro-Québec Bill
- Why does your consumption increase at night when everything is off?
- How to manage winter peak periods to maximize your Hilo credits?
- Electric or gas auxiliary heating: which costs less per hour?
- The forgotten insulation that lets $100 CAD of heat escape per year
- When does replacing your windows become energetically profitable?
- Thermal camera: how to interpret the blue zones on your walls in winter?
- Rate DT calculator: how much will you really save in a typical year?
- How to Connect Your Hilo Smart Thermostat for Maximum Cash Back?
Why does your consumption increase at night when everything is off?
It’s one of the most frustrating energy mysteries for a homeowner: you go to bed, turn everything off, and yet your smart meter shows a consistent, costly hum of electricity usage throughout the night. The culprit is a phenomenon known as “phantom load” or “vampire power.” These are devices that continue to draw power even when they are in standby mode or supposedly “off.” Individually, their consumption is tiny, but collectively, they represent a major drain on your finances. In fact, some studies show that phantom loads account for up to 40% of the annual energy consumption of electronic devices.
In a typical Quebec home, the biggest nighttime energy vampires are often not what you’d expect. While we all know to turn off the lights, the real drains are entertainment systems, home office setups, and even kitchen appliances. Your PVR or cable box, for instance, is constantly ready to record. Your smart speakers are always listening. Your modem and router are always broadcasting. Even your coffee maker with a digital clock and your microwave are sipping electricity 24/7.
Another significant, and often overlooked, nighttime consumer is your electric water heater. If you have a tiny, slow drip in a faucet or a toilet that runs intermittently, it forces the water heater to cycle on and off all night to keep the tank at temperature. This can add a surprising amount to your bill. The first step to plugging these invisible leaks is to conduct a simple nighttime audit.
Here are the key areas to investigate to hunt down and eliminate these phantom loads:
- Entertainment and Office Devices: Check all PVRs, cable boxes, smart speakers, computers, and monitors. The best solution is to plug them into a smart power strip that can be scheduled to turn off completely overnight.
- Water Heater and Plumbing: Before bed, inspect the area around your water heater for any signs of leaks. Listen for dripping faucets or toilets that might be running silently. A small, inexpensive washer replacement can save a lot of energy.
- Basement Equipment: Devices like sump pumps and dehumidifiers can be major energy users. For winter, ensure your dehumidifier is set correctly, typically between 30% and 50% relative humidity, to prevent it from running unnecessarily in the naturally drier air.
How to manage winter peak periods to maximize your Hilo credits?
Signing up for Hydro-Québec’s Hilo smart home service is a great first step, but the real savings come from actively managing your participation, especially during critical winter peak events. Hilo is designed to reward you for shifting your energy consumption away from high-demand periods, which typically occur on weekday mornings (6 AM to 10 AM) and evenings (4 PM to 8 PM). It’s not just about enrolling; it’s about engaging in the “challenges” Hilo issues during the coldest days. The collective impact is massive; according to Hydro-Québec’s latest data, over 400,000 customers helped reduce demand by 530 megawatts during each peak event last winter.
Hilo offers three levels of participation for each challenge—Moderate, Bold, and Extreme. The more you reduce your consumption, the higher your cash rewards. The system automates much of this by slightly lowering your thermostat temperature during the event, but you can maximize your earnings by making a few conscious behavioral changes. This means avoiding the use of major appliances like the dishwasher, washing machine, or oven during these few hours. It’s a small inconvenience for a significant financial return over the course of the winter.
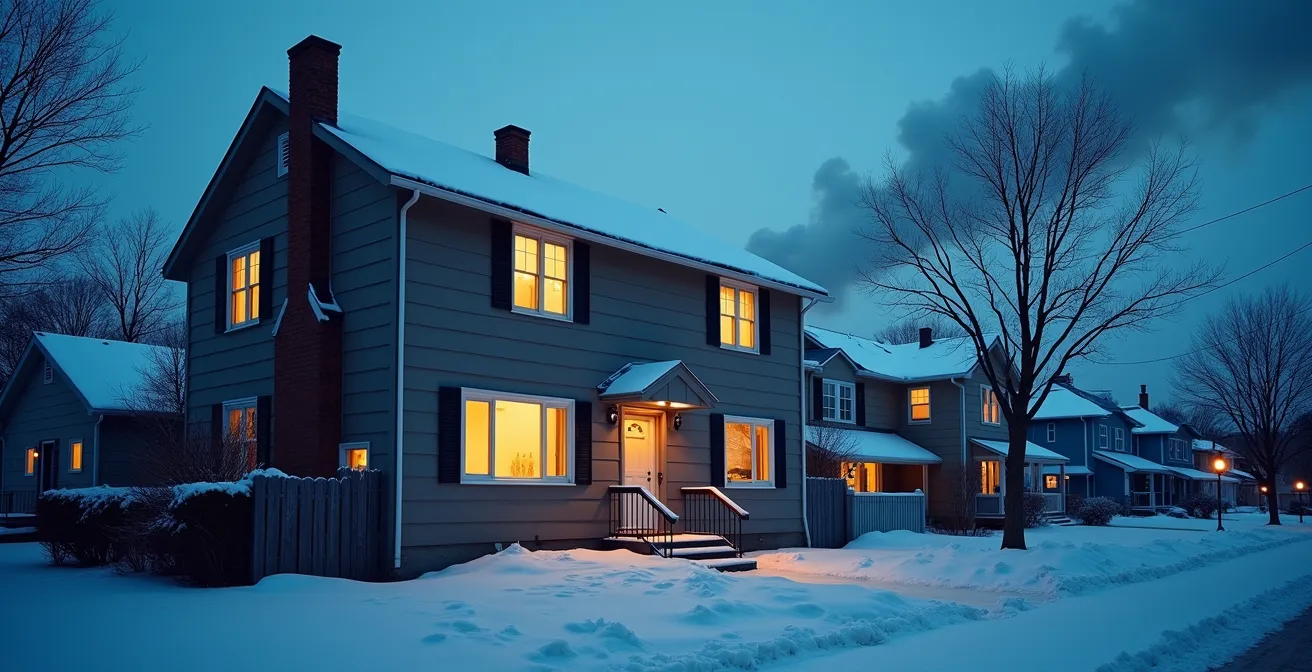
For a homeowner looking to achieve that 20% savings goal, the ultimate strategy is to combine Hilo with Hydro-Québec’s Rate Flex D. This synergy is where the magic happens. The image below perfectly captures the feeling Hilo aims to provide: a warm, comfortable sanctuary, even as you’re actively saving money while the cold winter rages outside.

As you can see, the focus is on maintaining comfort while the smart system works in the background. The key is to pre-heat your home slightly before the peak event begins and then let the temperature drift down a couple of degrees. You remain comfortable, wrapped in a blanket with a hot drink, while your smart thermostat and your wallet do the heavy lifting.
Case Study: Hilo and Rate Flex D Combined Strategy
Hydro-Québec’s own data shows that customers who combine the Hilo smart home service with Rate Flex D can achieve savings of up to 20% on their winter bills. The Hilo system automatically manages thermostats during peak events (6-10 AM and 4-8 PM), while Rate Flex D provides a lower electricity price for approximately 95% of the entire winter. By letting Hilo automatically manage the high-price periods, customers benefit from the low price the rest of the time without sacrificing comfort.
Electric or gas auxiliary heating: which costs less per hour?
When a polar vortex descends on Montreal, your primary heating system can struggle to keep up. The natural reaction is to reach for an auxiliary or space heater. But which type will warm your room without burning a hole in your wallet? The answer depends heavily on the specific context of your home and energy plan. First, it’s vital to understand the sheer scale of heating costs in winter.
When it’s -30°C, heating can account for up to 80% of the electricity use of an average Québec household.
– Hydro-Québec, Saving during winter peaks guide
This staggering figure underscores why your choice of auxiliary heat is so critical. An inefficient choice, used for just a few hours a day, can quickly inflate your bill. While a propane heater might seem powerful, its hourly operating cost is significantly higher than electric options in Quebec, where electricity rates are relatively low. However, not all electric heaters are created equal. The cost of running a 1500W electric heater can vary dramatically depending on whether you’re using it during a low-cost period or a high-cost winter peak event on a plan like Rate Flex D.
The following table breaks down the approximate hourly costs and best use cases for common auxiliary heating options available to Quebecers. This comparison assumes standard rates and can be used as a general guide for making cost-effective decisions.
| Heating Type | Power/Capacity | Hourly Cost (CAD) | Best Use Case |
|---|---|---|---|
| 1500W Electric Heater | 1500W | $0.15-0.45* | Small closed room (100 sq ft), 2-3 hours |
| Propane Heater | 20,000 BTU | $0.80-1.20 | Large open spaces, garages |
| Heat Pump | Variable | $0.30-0.60 | Whole home, most efficient |
| Electric Baseboards | Per room | $0.40-0.90 | Continuous heating, zoned control |
The asterisk on the 1500W electric heater is crucial: the $0.15/hour cost reflects usage during off-peak times on a dynamic rate, while the $0.45/hour reflects usage during a peak winter event. This tripling in cost highlights the importance of strategic scheduling. For small, targeted heating, a simple electric heater is almost always the cheapest option in Quebec, provided you use it outside of Hilo challenge periods.
The forgotten insulation that lets $100 CAD of heat escape per year
Most homeowners are diligent about checking for drafts around windows and doors. We caulk, we weatherstrip, and we might even put up plastic film. But one of the most significant sources of heat loss in many Quebec homes is completely overlooked because it’s hidden in the basement: the rim joist. The rim joist is the wooden perimeter of the floor framing that sits directly on top of your cold, concrete foundation wall. In an uninsulated basement, this area is a thermal bridge, conducting cold directly from the outside and allowing precious heat to escape from the floor above.
An uninsulated rim joist across an entire basement can be equivalent to leaving a small window open all winter long. The financial impact is not trivial, often accounting for over $100 in wasted heating costs annually. While general air sealing is important—indeed, comprehensive weatherstripping can save up to 10% on total energy costs—tackling the rim joist provides a massive return for a relatively small investment in time and materials. It’s a DIY project that a handy homeowner can complete in a weekend.
The process involves cutting rigid foam boards to fit snugly between the floor joists against the rim joist, and then sealing the edges with expanding foam. This creates an airtight and insulated barrier that stops both air leakage and thermal conduction. It’s a critical step in creating a complete “thermal envelope” around your home.
Here is a step-by-step guide to properly insulating this critical area:
- Access and Clean: Go to your basement or crawlspace and locate the rim joist area (the very top of the foundation wall). Clear away any debris or old, sagging insulation and inspect the wood for any signs of moisture damage.
- Cut Insulation: Measure the space between your floor joists. Cut pieces of rigid foam insulation board (a minimum of R-10 is recommended) to fit tightly into each cavity.
- Seal the Gaps: Place the foam board against the rim joist. Use a can of expanding spray foam to seal all four edges of the board. Pay special attention to sealing any holes where wires or pipes penetrate the rim joist.
- Add a Vapour Barrier: Depending on your local building code and the specific materials used, you may need to apply a vapour barrier. Always check the Quebec building code requirements for basement insulation.
- Add More Insulation (Optional): If space permits, you can install fiberglass batt insulation over the foam board for an even higher R-value, further increasing your energy savings.
When does replacing your windows become energetically profitable?
Windows are a classic energy efficiency dilemma. We know that old, single-pane windows are a major source of heat loss, but the high upfront cost of replacement—often running into tens of thousands of dollars—can be a daunting investment. So, when does it actually make financial sense? The answer lies in calculating the payback horizon: the point at which your accumulated energy savings equal the initial cost of the new windows. In Quebec, this calculation is made much more favourable thanks to provincial incentive programs.
Before considering a full replacement, it’s important to know there are effective, low-cost temporary solutions. For instance, installing a simple, clear plastic film kit on the inside of your window frames can significantly reduce drafts. While it won’t offer the same insulating value as a new window, it’s a highly effective stop-gap measure. In fact, simple measures like using heavy-duty plastic sheets can reduce heat loss through windows by as much as 14%.
However, for a long-term solution, replacement is the ultimate goal. The key to a profitable upgrade is leveraging programs like Rénoclimat and choosing the right type of window. You should look for ENERGY STAR® certified windows, specifically models rated for our cold climate (Zone 3), with a low U-factor (a measure of heat loss; the lower the better). A U-factor below 1.22 (or 0.21 in BTU) is a good target for Quebec.
Case Study: Rénoclimat Window Upgrade ROI Analysis
The Quebec Rénoclimat program offers financial assistance for energy-efficient home retrofits, including windows. A typical household replacing old single-pane windows with modern, ENERGY STAR® certified double-pane, low-E argon units can expect annual heating savings of $200 to $400. When combined with Rénoclimat grants, which can cover a significant portion of the cost, the payback period for the investment is often reduced to a more manageable 7 to 10 years, making it a sound long-term financial decision.
Thermal camera: how to interpret the blue zones on your walls in winter?
A thermal imaging camera is a powerful diagnostic tool for any homeowner serious about cutting energy waste. When you point it at a wall on a cold winter day, it reveals a hidden world of heat. Warmer areas appear in yellow, orange, or red, while colder spots show up as purple or dark blue. Seeing these blue zones can be alarming, but they aren’t always a sign of a major problem. The key is to interpret the *pattern* of the blue to understand the root cause and the right solution.
A common finding is faint, vertical blue lines that correspond to the location of your wall studs. This is called thermal bridging. Wood is a better insulator than air, but it’s a worse insulator than the fiberglass or mineral wool in your wall cavity. It’s normal to see some heat loss through the studs. However, if these lines are very dark and distinct, it may indicate insufficient overall insulation. The most critical heat loss often happens not through the middle of walls, but at the edges and penetrations, where air can leak in.
Finding the source of these cold spots is paramount, as experts find that significant heat loss occurs through walls, especially around electrical outlets and anywhere utilities enter your home. By identifying these specific weak points with a thermal camera, you can apply targeted, low-cost fixes that have a big impact. Many tool libraries or local groups in Quebec offer thermal cameras for loan, making this an accessible diagnostic project.
Here is a quick guide to interpreting the most common blue patterns and what to do about them:
- Blue Lines Following Wall Studs: This is normal thermal bridging. If the effect is severe, you might consider adding a layer of rigid insulation to the interior of the wall during a future renovation.
- Irregular Blue Patches in the Middle of a Wall: This is a red flag. It often means the insulation inside the wall cavity has settled, leaving a void. This usually requires a professional to inspect and add blown-in insulation to fill the gap.
- Dark Blue Streaks from Outlets/Switches: This indicates cold air infiltration. This is an easy and very effective fix: simply install inexpensive foam gaskets behind the outlet and switch cover plates.
- Blue at the Corners Where Walls Meet the Ceiling: This is a classic sign of attic air leakage. Cold air from the attic is spilling down into the top of your walls. The solution is to get into the attic, seal the top plates of the walls with caulk or foam, and ensure you have adequate attic insulation.
- Blue Around Window and Door Frames: This signals that the exterior caulking has failed. You’ll need to remove the old, cracked caulk and re-apply a high-quality, exterior-grade sealant.
Rate DT calculator: how much will you really save in a typical year?
For Quebec homeowners with a dual-energy heating system (typically a heat pump paired with a fossil fuel furnace), Hydro-Québec’s Rate DT has long been the default choice. This rate offers a lower price for electricity but gives Hydro-Québec the right to interrupt service to your heat pump during extreme cold, forcing you to switch to your more expensive backup fuel. But with the rise of dynamic pricing, is Rate DT still the best option? The answer is: it depends on your consumption profile and your willingness to adapt.
The main alternative is Rate Flex D, a dynamic rate designed for all-electric homes but available to anyone. It works on a simple principle: electricity has a very low base price for most of the winter, but a much higher price during a limited number of peak demand events. The strategic advantage is that Hydro-Québec’s Rate Flex D offers a lower electricity price 95% of the winter period, with the higher price only applying during the remaining 5% of peak events.
If you have a smart thermostat like Hilo, you can automatically and effortlessly reduce your consumption during these brief, expensive periods, allowing you to benefit from the ultra-low rate the rest of the time. For many, this can lead to greater savings than Rate DT, without the need for a fossil fuel backup. The table below outlines the key differences to help you decide which rate plan aligns best with your home and lifestyle.
| Criteria | Rate DT (Dual Energy) | Rate Flex D (Dynamic) |
|---|---|---|
| Ideal User Profile | Dual-energy system owners, 20,000+ kWh/year | All-electric homes willing to shift usage |
| Winter Savings Potential | 15-25% for high consumers | Up to 20% with behavior changes |
| Equipment Required | Heat pump + backup furnace | Smart thermostat recommended |
| Peak Period Action | Automatic switch to backup fuel | Manual or automated temperature reduction |
| Best For | Rural areas without natural gas | Urban/suburban with grid connection |
Calculating your exact savings requires analyzing your past consumption data, which is available in your Hydro-Québec customer space. However, the trend is clear: for homeowners who are willing to be flexible and leverage smart technology, Rate Flex D often presents a more compelling path to 20% savings than the traditional Rate DT. It puts more control back in your hands.
Key Takeaways
- Phantom loads from devices in standby mode are a real and significant cost; auditing and unplugging your electronics is low-hanging fruit for savings.
- The biggest Hilo rewards come from actively managing your consumption during peak events, not just from passive enrollment in the program.
- Your home’s “thermal envelope”—including insulation, windows, and the often-forgotten rim joist—is a system. A single weak point can undermine all your other efforts.
- Aligning your lifestyle with a dynamic rate plan like Rate Flex D is the final step that amplifies the savings you achieve through efficiency upgrades and smart technology.
How to Connect Your Hilo Smart Thermostat for Maximum Cash Back?
You’ve installed your Hilo smart thermostats, and you’re participating in challenges. This is the foundation of your savings strategy. But to truly maximize your cash back and hit that 20% reduction target, you need to think beyond just heating. The next level of optimization involves integrating other major appliances into your Hilo ecosystem, with the most impactful one being your electric water heater.
The water heater is one of the largest energy consumers in any home. By connecting it to Hilo, you allow the system to intelligently manage its operation during peak periods. It will prevent the water heater from turning on during the few hours of a Hilo challenge, and because the water in the tank stays hot for a long time, you won’t even notice a difference in hot water availability. This single addition can significantly boost your earnings for each challenge you complete.
Case Study: Hilo Water Heater Integration Success
Quebec households that connect both their smart thermostats and their electric water heater to the Hilo system report achieving the highest savings. The system automatically shifts the water heater’s consumption outside of the expensive peak periods (6-10 AM and 4-8 PM). When this is combined with Rate Flex D’s lower off-peak pricing, users consistently report bill reductions in the 20% range, on top of the cash rewards earned for each successfully completed Hilo challenge.
Getting to this level of optimization is a gradual process. It’s about building on your successes week by week. The following plan provides a clear roadmap to go from a basic setup to a fully optimized, money-saving smart home system.
Your Hilo Maximization Plan
- Week 1 (Monitor): Start by simply observing. Use the Hilo app to monitor your baseline consumption and identify your family’s unique energy usage patterns. When are your personal peaks?
- Week 2 (Adjust): Begin fine-tuning your thermostat schedules. If you work from home on certain days, use Hilo’s geofencing feature to automatically adjust the temperature when you leave the house for errands.
- Week 3 (Connect): Integrate your electric water heater. This typically involves having an electrician install a Hilo-compatible smart relay or plug rated for 240V. This is a crucial step for maximizing challenge rewards.
- Week 4 (Fine-tune): Experiment with the Hilo challenge participation modes. Start with “Moderate” and see how your family feels. If it’s comfortable, try “Bold” for the next challenge to increase your earnings.
- Month 2+ (Stack): Now, stack your savings. Actively coordinate your high-consumption activities (laundry, dishwasher) to fall outside of the daily Rate Flex D peak periods (6-9 AM, 4-8 PM) to fully leverage the lower off-peak rate.
Your journey to a 20% smaller bill starts not with a major renovation, but with a small investigation. Open your Hilo app, use the steps in this guide as your checklist, and begin taking active control of your home’s energy system today. The savings are waiting for you.